
How to Use Hair Toner at Home: A Complete Step-by-Step Tutorial
hair toner, blonde hair, hair dye, purple shampoo, brassy hair, hair care
Learn how to use hair toner at home with our complete step-by-step tutorial. Banish brassy hair and master toning blonde hair like a salon professional.
Welcome to your ultimate guide on how to use hair toner at home: a complete step-by-step tutorial. If you have recently lightened your locks and noticed unwanted warm, yellow, or orange tones, you are certainly not alone. Achieving that perfect, salon-fresh colour requires a little bit of science and the right products. Whether you are aiming for an icy platinum, a soft beige, or just want to refresh your highlights, mastering the art of hair toner is your secret weapon.
In this comprehensive guide, we will walk you through everything you need to know about neutralising brassy hair, choosing the right products, and applying them safely for flawless results.
Why Brassy Hair Happens
Before we dive into the application process, it is helpful to understand why your hair turns warm in the first place. Hair naturally contains underlying red, orange, and yellow pigments, which are especially dominant in darker hair types. When you lighten your hair with bleach or high-lift dye, the natural pigments are lifted, but some of those stubborn warm tones often remain behind, as noted in Brassy Hair Isn’t Just Colour Fade — Here’s What’s Actually Happening to Your Hair.
Additionally, environmental factors like hard water minerals, UV exposure, and heat styling can cause your colour to oxidise over time, turning a beautiful cool blonde into a brassy nightmare.
The Colour Wheel: Choosing Your Toner
To effectively neutralise unwanted tones, you must look to the colour wheel. Hair toners work by using opposite colours to cancel each other out:
- Yellow tones (Pale Blonde): Neutralised by violet/purple pigments. This is essential for toning blonde hair to an icy or platinum finish.
- Orange tones (Dark Blonde/Light Brunette): Neutralised by blue pigments. Perfect for cooling down caramel highlights or light brown hair.
- Red/Orange tones (Dark Brunette): Neutralised by green pigments.
What You'll Need
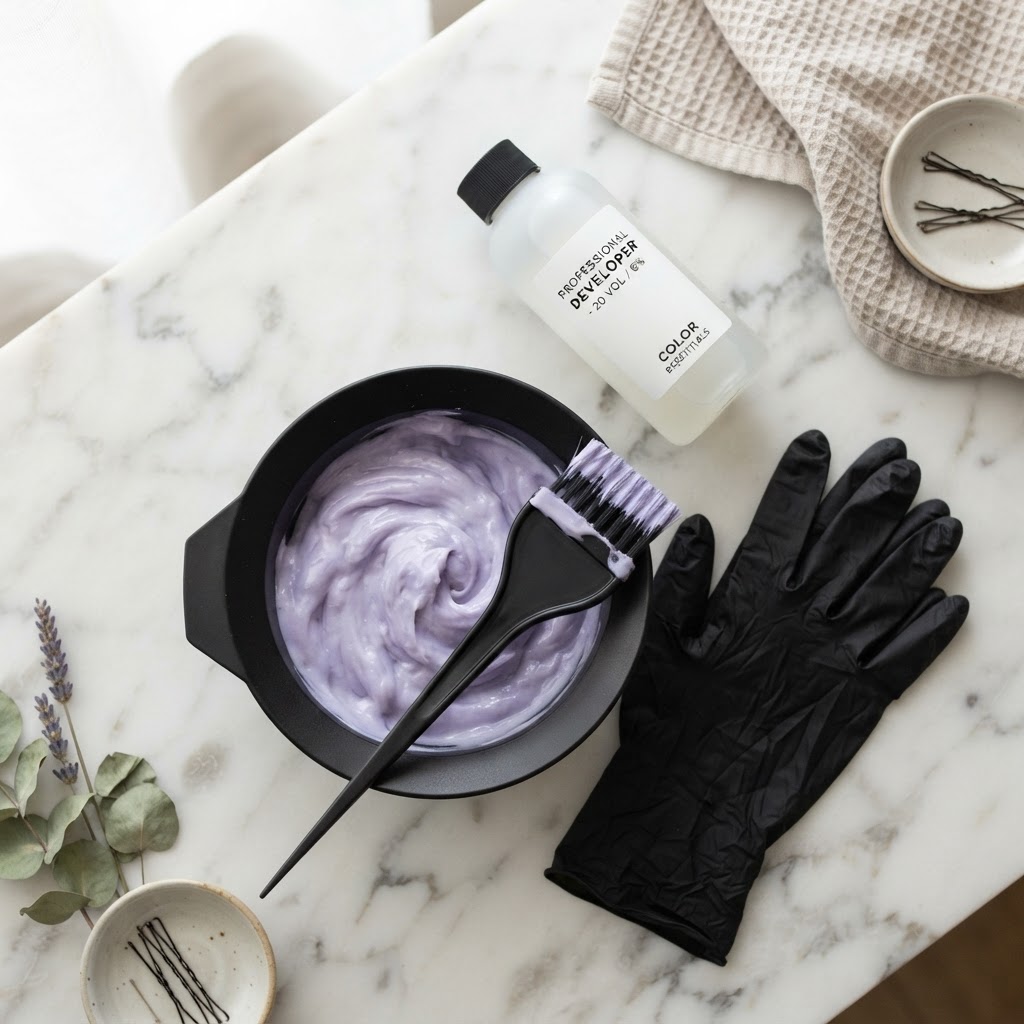
Preparation is key to achieving an even, professional-looking result. Gather the following supplies before you begin:
- Your chosen hair toner: Choose a demi-permanent or semi-permanent toner based on your desired shade.
- Developer: A low-volume developer is crucial. A 10-volume developer is standard for depositing colour without lifting the hair's natural base. Never use 30 or 40-volume for toning.
- Tint bowl and brush: For precise application.
- Sectioning clips: To ensure you do not miss any patches.
- Disposable gloves: To protect your hands from staining.
- An old t-shirt or hairdressing cape: To protect your clothes.
Step-by-Step: How to Apply Hair Toner at Home
Follow these steps carefully to ensure a beautiful, even result while maintaining the health of your hair.
Step 1: Prep and Strand Test
Always start with a patch and strand test 48 hours before full application to check for allergies and to see how your hair reacts to the formula. Wash your hair with a clarifying shampoo to remove product build-up, then towel-dry it gently. Most toners apply best to damp, towel-dried hair, as it helps the product distribute evenly.
Step 2: Mix Your Formula
Put on your gloves. In your tint bowl, mix your toner and developer according to the manufacturer's instructions. The standard ratio is often 1 part toner to 2 parts developer (1:2), but always verify this on your specific product's packaging. Mix thoroughly until you achieve a smooth, creamy consistency.
Step 3: Section and Apply
Divide your hair into four manageable quadrants (down the middle, and from ear to ear).
- Start at the warmest areas: Begin applying the toner to the areas that have the most brassiness, which is usually the mid-lengths and ends, or the face-framing pieces.
- Work methodically: Take small, thin slices of hair and paint the toner on with your tint brush.
- Saturate fully: Ensure every strand is coated. Once a section is complete, gently comb through it with a wide-tooth comb to guarantee even distribution.
Step 4: Process and Monitor
This is the most critical step. Do not just set a timer and walk away! Scalp heat can speed up processing, and porous hair absorbs colour rapidly.
- Check the hair every 2 to 3 minutes by wiping a small amount of toner off a strand with your gloved fingers.
- Processing usually takes anywhere from 5 to 20 minutes.
- Stop when the brassiness looks neutralised. As advised in How To Use Hair Toner At Home: Prep, Mix, Tone, Aftercare, if the hair starts looking too grey or purple, it is time to rinse immediately.
Step 5: Rinse and Condition
Once you have reached your desired shade, head to the sink. Rinse your hair thoroughly with lukewarm water until the water runs completely clear. Follow up with a rich, colour-safe conditioner or a deep conditioning mask to close the hair cuticle and restore moisture. Avoid shampooing for at least 48 hours to allow the colour to settle.
Purple Shampoo vs. Developer Toners
It is a common misconception that purple shampoo and hair toner are the exact same thing. While both help with toning blonde hair, they serve different purposes in your routine.
- Developer Toners: These are mixed with a developer to slightly open the hair cuticle and deposit long-lasting colour. They provide a significant colour correction and typically last 2 to 4 weeks.
- Purple Shampoo: This is a maintenance product. As noted in How to Tone Blonde Hair at Home, purple shampoo deposits a sheer veil of violet pigment on the surface of the hair to keep brass at bay between full toning sessions. It should be used sparingly (once a week) to avoid drying out the hair or leaving a dull, purple stain.
Aftercare for Long-Lasting Colour
To keep your newly toned hair looking fresh and vibrant for as long as possible, adopt a colour-safe hair care routine:
- Wash less frequently: Water and harsh detergents strip toner away. Aim to wash your hair only 2-3 times a week.
- Use sulphate-free products: Sulphates are notorious for fading hair colour quickly.
- Turn down the heat: Wash your hair in lukewarm water, and always use a heat protectant spray before using hot tools, as heat can cause the hair to oxidise and turn brassy.
- Incorporate a toning mask: Swap your regular conditioner for a blue or purple toning mask once a week to maintain your cool tones.
Common Mistakes to Avoid
- Toning hair that isn't light enough: Toner cannot lighten dark hair. If your hair is a dark orange, a purple toner will not make it platinum blonde; it will simply make it a muddy, cool brown. You must lift the hair to a pale yellow first if you want a platinum result.
- Leaving it on too long: Over-toning can leave blonde hair looking dull, grey, or even slightly violet. Always keep a close eye on the processing time.
- Using the wrong developer: Using anything higher than a 10-volume or 20-volume developer can unnecessarily damage the hair and lift your natural root colour, creating a banding effect.
Frequently Asked Questions (FAQ)
How often should I use hair toner at home?
Demi-permanent toners mixed with developer typically last between 2 to 4 weeks, depending on how often you wash your hair and its porosity. You can re-tone your hair every 3 to 4 weeks as needed.
Can I use hair toner on brown hair?
Absolutely! Brunettes who have balayage, highlights, or who simply struggle with natural red/orange undertones can benefit greatly from toning. Just ensure you use a blue or green-based toner rather than a purple one, as purple only neutralises yellow.
Will toner damage my hair?
Toners are generally much gentler than bleach or permanent hair dye because they use low-volume developers and do not lift the hair cuticle aggressively. However, any chemical process can cause slight dryness, which is why following up with a deep conditioning treatment is essential.
By understanding the colour wheel, choosing the right products, and following this step-by-step guide, you can confidently banish brassy hair and maintain a gorgeous, salon-quality finish from the comfort of your own bathroom.