
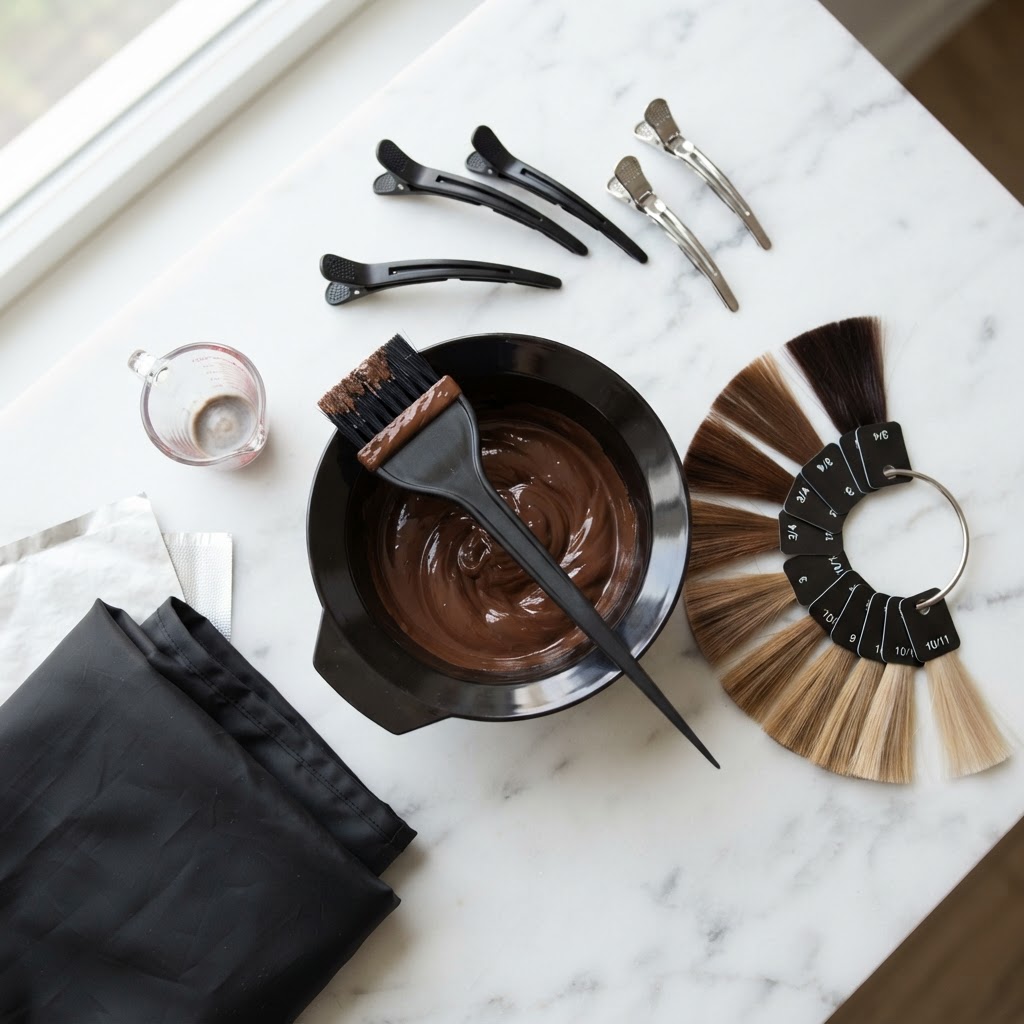
How to Use a Hair Color Chart to Find Your Perfect Shade
Hair Colour Chart, DIY Hair Dye, Hair Colouring Tips, At-Home Beauty
Discover how to use a hair color chart to find your perfect shade at home. Learn about levels, tones, and expert tips for flawless DIY hair colouring.
Welcome to your ultimate guide on decoding the mysteries of home hair dyeing! If you have ever stood in the beauty aisle feeling overwhelmed by the sheer number of boxes, you are not alone. The secret to achieving salon-worthy results at home is learning how to use a Hair Color Chart. By understanding the universal numbering system used by professionals, you can take the guesswork out of choosing a shade and achieve a beautiful, predictable result every single time.
Understanding the Basics: What is a Hair Colour Chart?
When it comes to changing your look, knowing how a hair colour chart works is fundamental. The system is broken down into two main components: the base level and the tone.
1. The Base Level (Depth)
The first number on any professional or high-quality box dye indicates the depth of the colour. According to the Hair Colour Numbering System | L'Oréal Professionnel UK, this universal level system runs from 1 to 10:
- Level 1: Black
- Level 2: Darkest Brown
- Level 3: Dark Brown
- Level 4: Medium Brown
- Level 5: Light Brown
- Level 6: Dark Blonde
- Level 7: Medium Blonde
- Level 8: Light Blonde
- Level 9: Very Light Blonde
- Level 10: Lightest Blonde
2. The Tone (Reflect)
The numbers or letters following the decimal point (or dash) represent the tone. Tones add warmth, coolness, or neutrality to your base level. For instance, a .1 indicates an Ash tone (which has a blue/green base to neutralise red or orange), while a .3 indicates a Golden tone for added warmth. If you see a shade labelled '5.3', you are looking at a Medium Golden Brown.
What You'll Need for At-Home Colouring
Before you begin mixing, preparation is key. Gathering the right tools will make the process smoother and protect your skin and bathroom surfaces.
- A non-metallic mixing bowl and tint brush: Essential for an even, professional application.
- Sectioning clips: To divide your hair into manageable quadrants.
- Barrier cream: Apply petroleum jelly around your hairline and ears to prevent skin staining.
- Gloves: Always protect your hands from chemicals.
- The right developer: If you are buying professional tubes, you will need a developer. Use 10 Vol (3%) for depositing colour or going darker, 20 Vol (6%) for covering grey hair or lifting 1-2 levels, and 30 Vol (9%) for lifting up to 3 levels.
Step-by-Step: Choosing a Shade and Applying It
Follow these expert steps to ensure your DIY dye job goes off without a hitch.
Step 1: Identify Your Natural Base
Isolate a section of hair from the crown of your head in natural daylight. Compare it to a hair colour chart to find your starting level. Be honest with yourself—most people naturally fall between levels 3 and 7.
Step 2: Pick Your Target Level
When choosing a shade, a golden rule of thumb is to stay within two levels of your current colour. As noted in Hair Coloring Tips & Charts to Pick the Right Shade - Rumbie, going too light or too dark in a single step can cause severe damage or result in patchy colour.
Step 3: Select the Right Tone
Use a shade selector to determine if you need warm or cool tones. If your hair naturally pulls red or brassy when lightened, opt for an ash (.1) or iridescent (.2) tone to neutralise the warmth. If your skin looks washed out, a warm golden (.3) or copper (.4) tone can add a beautiful glow.
Step 4: The Crucial Patch and Strand Test
Always perform an allergy patch test 48 hours before full application. Simultaneously, do a strand test on a hidden piece of hair. This confirms the processing time (usually 30-45 minutes) and ensures the final colour matches your expectations.
Step 5: Section and Apply
Divide your hair into four quadrants (part down the middle, then ear to ear). Start applying the colour at the roots. If you are covering stubborn greys, start at the front hairline where they are most visible and require the longest processing time. If you are just refreshing your ends, only pull the colour through for the last 5-10 minutes to prevent over-processing.
Common Mistakes When Using a Shade Selector
Even with the best intentions, home colourists often fall into a few common traps:
- Trusting the box model: The smiling model on the box is not a reliable indicator of your final result. Always rely on the hair colour chart and the numbering system.
- Ignoring underlying pigment: When you lighten hair, it exposes warm underlying pigments (red, orange, or yellow). If you are lifting your hair, you must choose a shade with a cool tone to counteract this brassiness, a concept rooted in basic colour theory as explained by How to find your best hair color using the hair color chart.
- Overlapping bleach or permanent dye: Applying permanent colour over previously dyed hair can cause 'colour banding' and severe breakage. Only apply permanent dye to virgin root regrowth.
Aftercare for Your Perfect Shade
Once you have achieved your dream colour, you need to protect your investment. Permanent hair dye permanently alters the hair structure, meaning it requires extra TLC.
- Wait 72 hours before washing: This allows the hair cuticle to fully close, locking in the new colour molecules.
- Use colour-safe, sulphate-free shampoo: Harsh detergents will strip your colour prematurely.
- Incorporate a toning mask: If you went blonde, a purple shampoo or mask will keep brassiness at bay between colouring sessions.
FAQ: Mastering the Hair Colour Chart
How do I know if I need an ash or gold tone?
Look at the veins on your wrist. If they appear blue/purple, you have cool undertones and will suit ash or violet tones. If they look green, you have warm undertones and will glow in golden or copper shades. If you are unsure, a neutral (.0) tone is a safe, flattering middle ground.
Can I go from a Level 2 (Darkest Brown) to a Level 9 (Very Light Blonde) at home?
It is highly discouraged. Lifting hair more than two or three levels requires bleach, multiple sessions, and complex toning to avoid severe damage and bright orange hair. Major transformations should be left to salon professionals.
How often should I touch up my roots?
For permanent colour, root touch-ups are typically needed every 6 to 8 weeks. Remember to only apply the dye to the new growth to prevent darkening and damaging the rest of your hair.
By taking the time to understand the hair colour chart, you empower yourself to make informed, professional-level decisions from the comfort of your own bathroom. Happy colouring!